We felt that loading the test environment and running the tests took far too much time.
There were many cases where Cypress failed to find elements in the test environment, and we couldn't figure out the cause.
Cypress's own syntax was unfamiliar to FE developers.
Even when we wanted to run tests in parallel to improve test speed, there was the hurdle of having to pay an additional fee.
→ To overcome these difficulties, we started looking for another testing library, and along the way we discovered one that could solve the problems above. That library is Playwright, built by Microsoft.
Cypress vs Playwright
Test speed comparison
When running with link navigation first for e2e test isolation, based on a single spec it wasn't dramatically faster than Cypress.
However, when running in parallel with a large number of cases, we could feel that the test speed increased.
Playwright provides a beforeAll function, so in web apps built with a SPA structure, we could feel that the test speed increased when navigating to a link once at the beginning and then using page.goBack(), compared to beforeEach. (However, since you can't obtain the page in beforeAll, you have to create a new one, and in that case you can't run tests in parallel.)
After adding it to a company project, we found that it was roughly 5 times faster.
Supported test environments
Playwright
Chromium-based browsers, Firefox, Safari support
Mobile browser support
Experimental mode: Android Chrome/WebView, Electron support planned
Cypress
Only supports two browsers: Chromium-based browsers and Firefox
Parallel test support
Playwright
Runs all tests in parallel
Can set up to 4 worker threads
However, when specifying worker threads, isolating each test unit is mandatory!!
Cypress
Runs all tests serially
However, to run parallel tests, you must subscribe to a paid plan to run parallel tests in a CI/CD environment → you have to pay money ㅜㅜ)
Rich event support
Supports hover and drag (not supported by Cypress)
Syntax
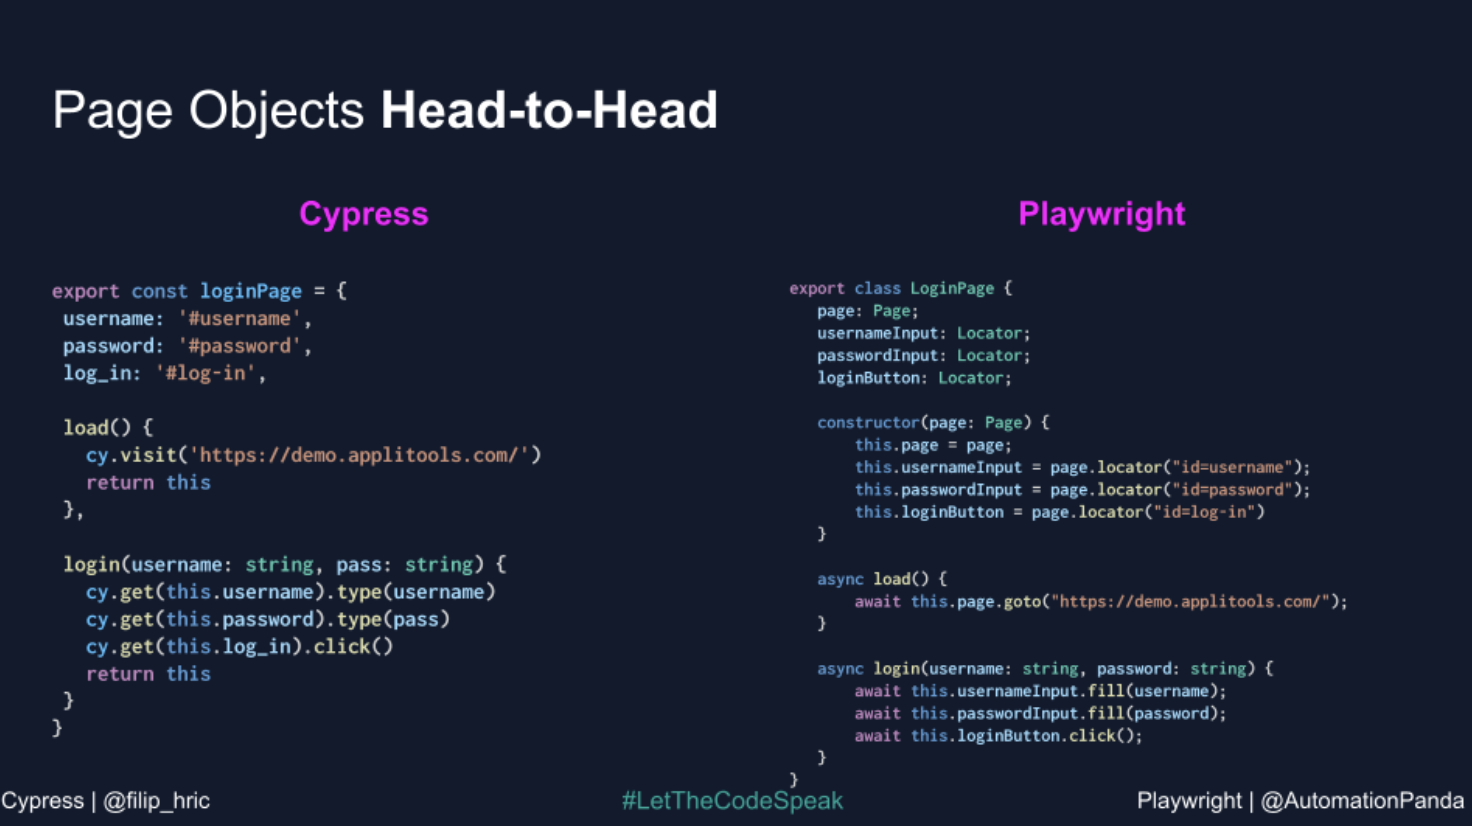
Supports the pure, native syntax of the language it targets. (Cypress provides its own custom syntax)
Introducing Playwright
Playwright is an open-source web testing and automation library built by Microsoft. With a single API, it can test Chromium, Firefox, WebKit, and mobile web (Chromium, Safari, etc.). (In the Next version, it appears to also support Android Chrome and Electron via ADB.)
In fact, Playwright itself is not an E2E testing framework; cross-browser testing becomes possible by using the @playwright/test framework. (However, it does not support legacy Edge or IE.)
Playwright Features
Features
A single API for multi-browser/platform testing
Cross-browser: Supports the latest modern browsers Chromium, Webkit, and Firefox
Cross-platform: Windows, Linux, MacOS, locally or CI, headless or headed
Timeout for each test, includes test, hooks and fixtures:SET DEFAULTconfig = { timeout: 60000 }OVERRIDEtest.setTimeout(120000)
Expect timeout
5000 ms
Timeout for each assertion:SET DEFAULTconfig = { expect: { timeout: 10000 } }OVERRIDEexpect(locator).toBeVisible({ timeout: 10000 })
Action timeout
no timeout
Timeout for each action:SET DEFAULTconfig = { use: { actionTimeout: 10000 } }OVERRIDElocator.click({ timeout: 10000 })
Navigation timeout
no timeout
Timeout for each navigation action:SET DEFAULTconfig = { use: { navigationTimeout: 30000 } }OVERRIDEpage.goto('/', { timeout: 30000 })
Global timeout
no timeout
Global timeout for the whole test run:SET IN CONFIGconfig = { globalTimeout: 60601000 }
beforeAll/afterAll timeout
30000 ms
Timeout for the hook:SET IN HOOKtest.setTimeout(60000)
Fixture timeout
no timeout
Timeout for an individual fixture:SET IN FIXTURE{ scope: 'test', timeout: 30000 }
Tips
It seems best to write test cases in Korean, which is easy to read and conveys meaning clearly.
Companies like Kakao, NHN, and Class101 also appear to write their test cases in Korean.
CLI
You can run tests in the terminal with the following command. By default, it runs in headless mode.
What is headless?
It refers to a browser without a GUI environment. It means running in the CLI (Command Line Interface).
yarn playwright test
Reference for run options: https://playwright.dev/docs/test-cli
Tests are run against the browsers/platforms configured in the settings file.
You can specify one of the browsers/platforms provided by Playwright's built-in emulator (chromium, firefox, safari) to run tests.
https://playwright.dev/docs/emulation
Testing considerations
Improving Test Speed
The parts that take the most time during a test run should be handled so that they can be performed before the test runs.
If the speed is slow, you won't be able to respond quickly after deployment, so please think carefully about test execution time before proceeding with development.
// context, page 생성 시간 단축을 위해서 테스트 전에 한번만 수행test.beforeAll(async ({ browser, baseURL, contextOptions }) => { const context = await browser.newContext(contextOptions); page = await context.newPage(); await page.goto('/');});test.beforeEach(async ({ isMobile }) => { if (isMobile) { await page.locator('[aria-label="navigation-button"]').click(); await page.locator('[aria-label="about-link"]:visible').click(); } else { await page .locator( '[aria-label="desktop-navigation"] [aria-label="about-link"]:visible', ) .click(); }});
⭐ Testing Strategy ⭐
Parallel Testing
Provides guidance to isolate test code so that each test is not dependent on others
Currently set to run only on a single thread
Multi-Platform/Browser Testing
We need to establish a target multi-platform/browser strategy specific to the service.
Other companies' cases
Hyperconnect: Runs Safari testing as a requirement
describe, test
Use describe to logically group tests, and write tests with test.
Within describe, when you need setup/teardown for the entire group of tests, try using beforeAll and afterEach,
→ Because creating context and page takes a lot of time, creating them in advance before all tests can reduce test time.
When you need setup/teardown work for each individual test, please use beforeEach and afterEach.
import { expect, Page, test, BrowserContext } from '@playwright/test';test.describe('홈', () => { let browserContext: BrowserContext; let page: Page; // beforeAll hook은 최초 딱 한번 실행. initialize 작업 등을 수행 test.beforeAll(async ({ browser, contextOptions }) => { browserContext = await browser.newContext(contextOptions); }); test.beforeEach(async ({ isMobile }) => { // 페이지 생성 page = await browserContext.newPage(); await page.goto('/'); if (isMobile) { await page.locator('[aria-label="navigation-button"]').click(); await page.locator('[aria-label="career-link"]:visible').click(); } else { await page .locator( '[aria-label="desktop-navigation"] [aria-label="career-link"]:visible', ) .click(); } }); test.afterEach(async () => { await page.close(); }); test.afterAll(async () => { await browserContext.close(); }); test('02-5. Carrer 상세 화면에 대한 검증을 한다.', async () => { const element = await page.locator('main > section > ul > li a').first(); const href = (await element.getAttribute('href')) as string; element.click(); await expect(page).toHaveURL(href); const subElement = await page.locator('main section > div').first(); await expect(subElement).toBeVisible(); });});
Test Titles
Test titles should be as explicit as possible so that you can tell what the test does just by looking at the title, and they should be written as active sentences. (Avoid passive expressions like "~ is done" and instead write active expressions like "~ does".)
Handy Little Tips
test.only
When a test file has multiple test cases, even if you modify only one test, all test cases in the file will run. You can use test.only to run only the test case you are currently working on.
test.skip
When a test case can't be run but you still want it in the test list, you can use test.skip. It will be counted as pending in the final results.
Selector
Playwright's selectors are provided based on query priority, and when that feature doesn't work you can use locators to freely access elements.
Query priority
Priority among queries for testing visual elements / user interactions
Priority among queries for testing HTML5 and ARIA attributes
getByAltText > getByTitle
Test ID: Used only to find values that cannot be found with the queries above
getByTestId
It seems best to decide on the data attribute through team consensus.
If you cannot access it even with these priorities, you can use locator.
const element = await page.locator('main > section > ul > li a').first();
Using Testing Tools
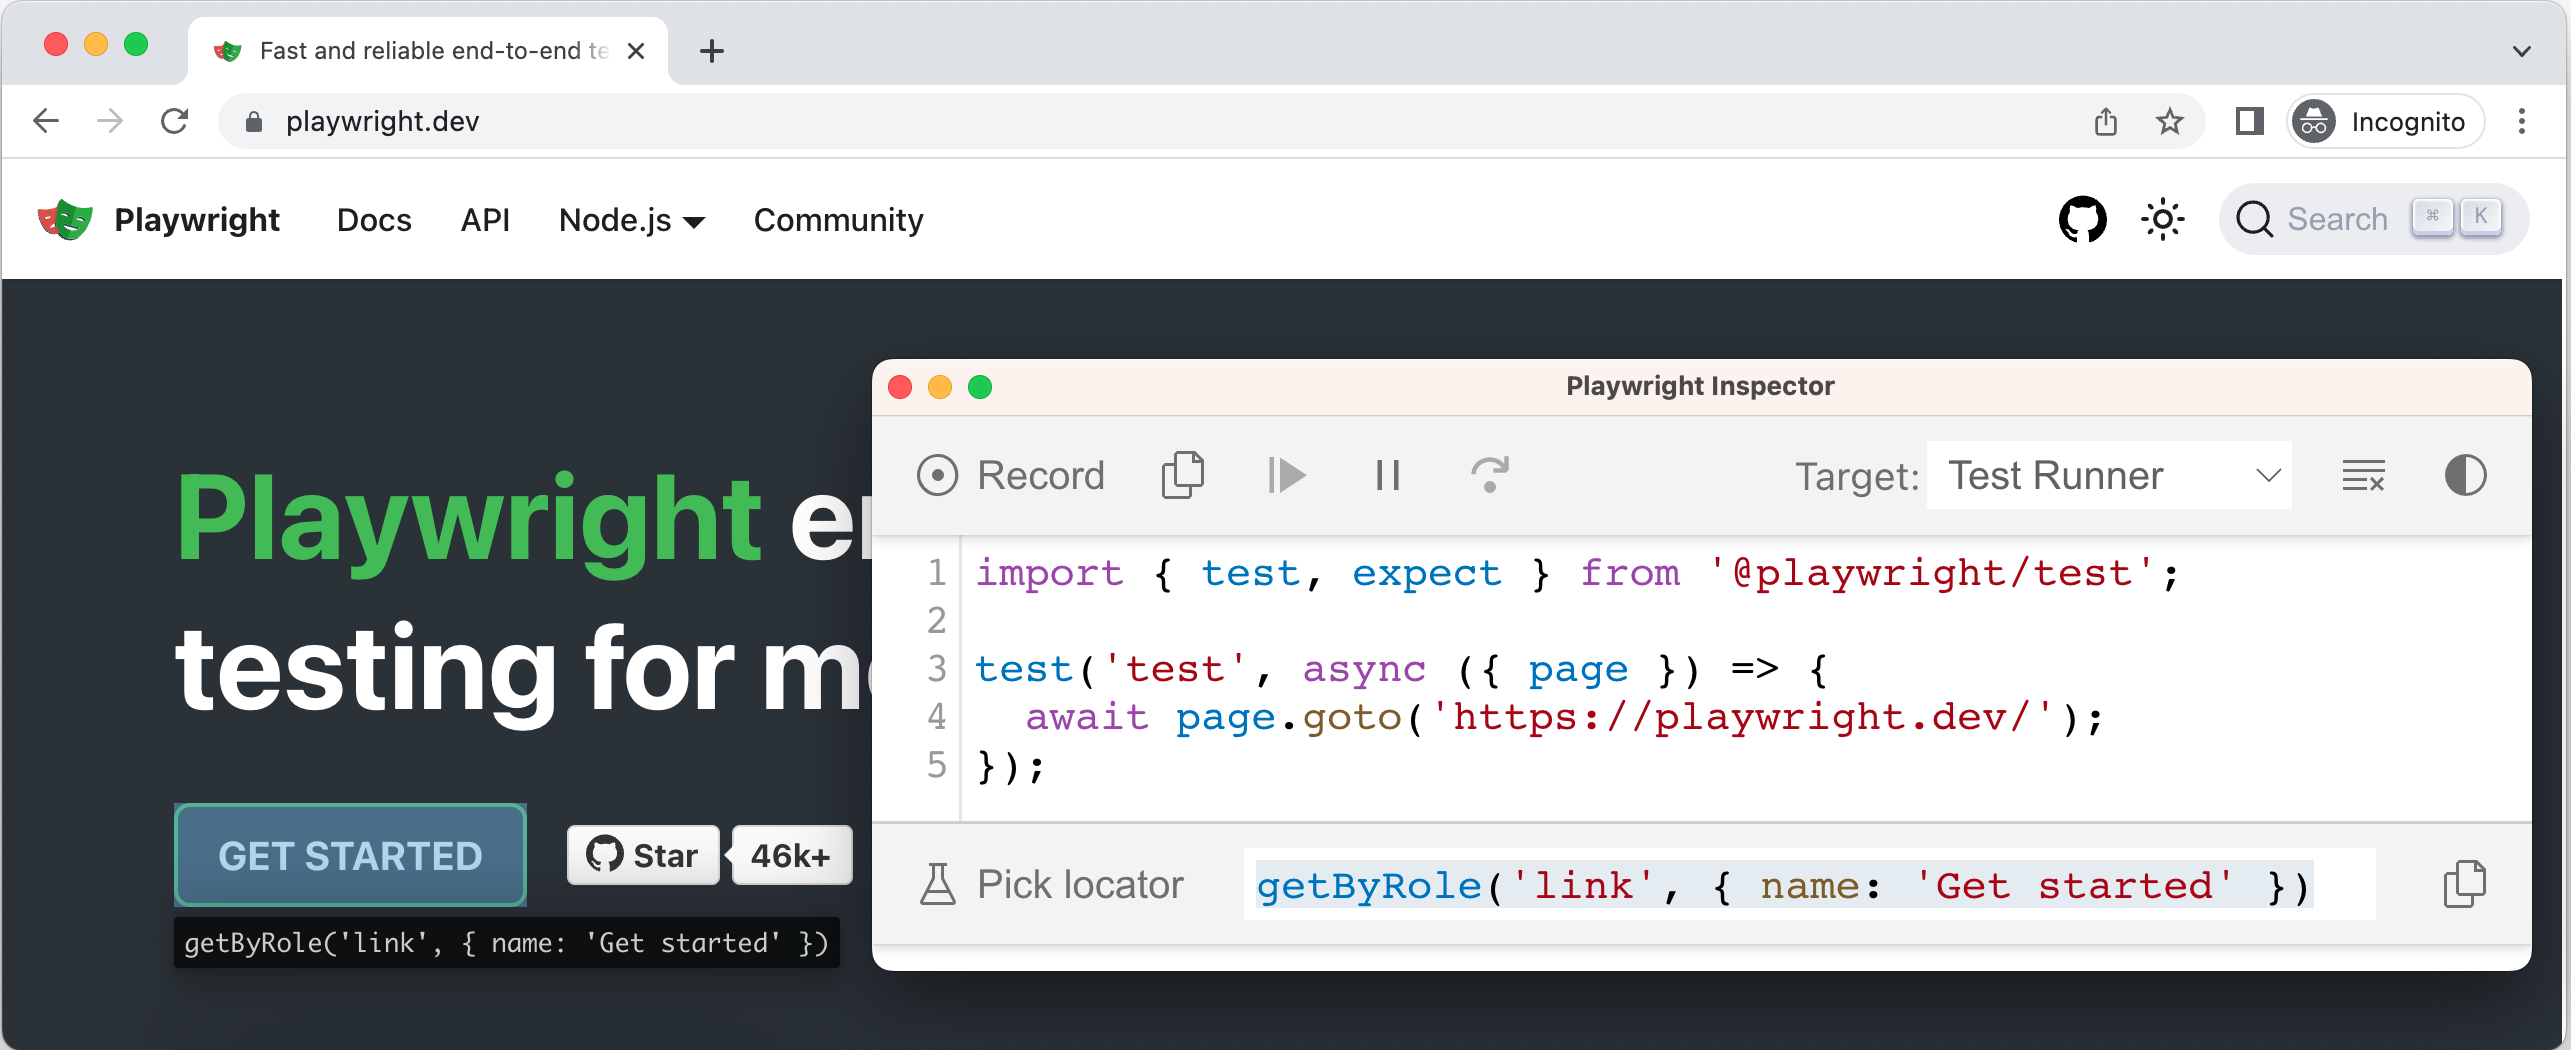
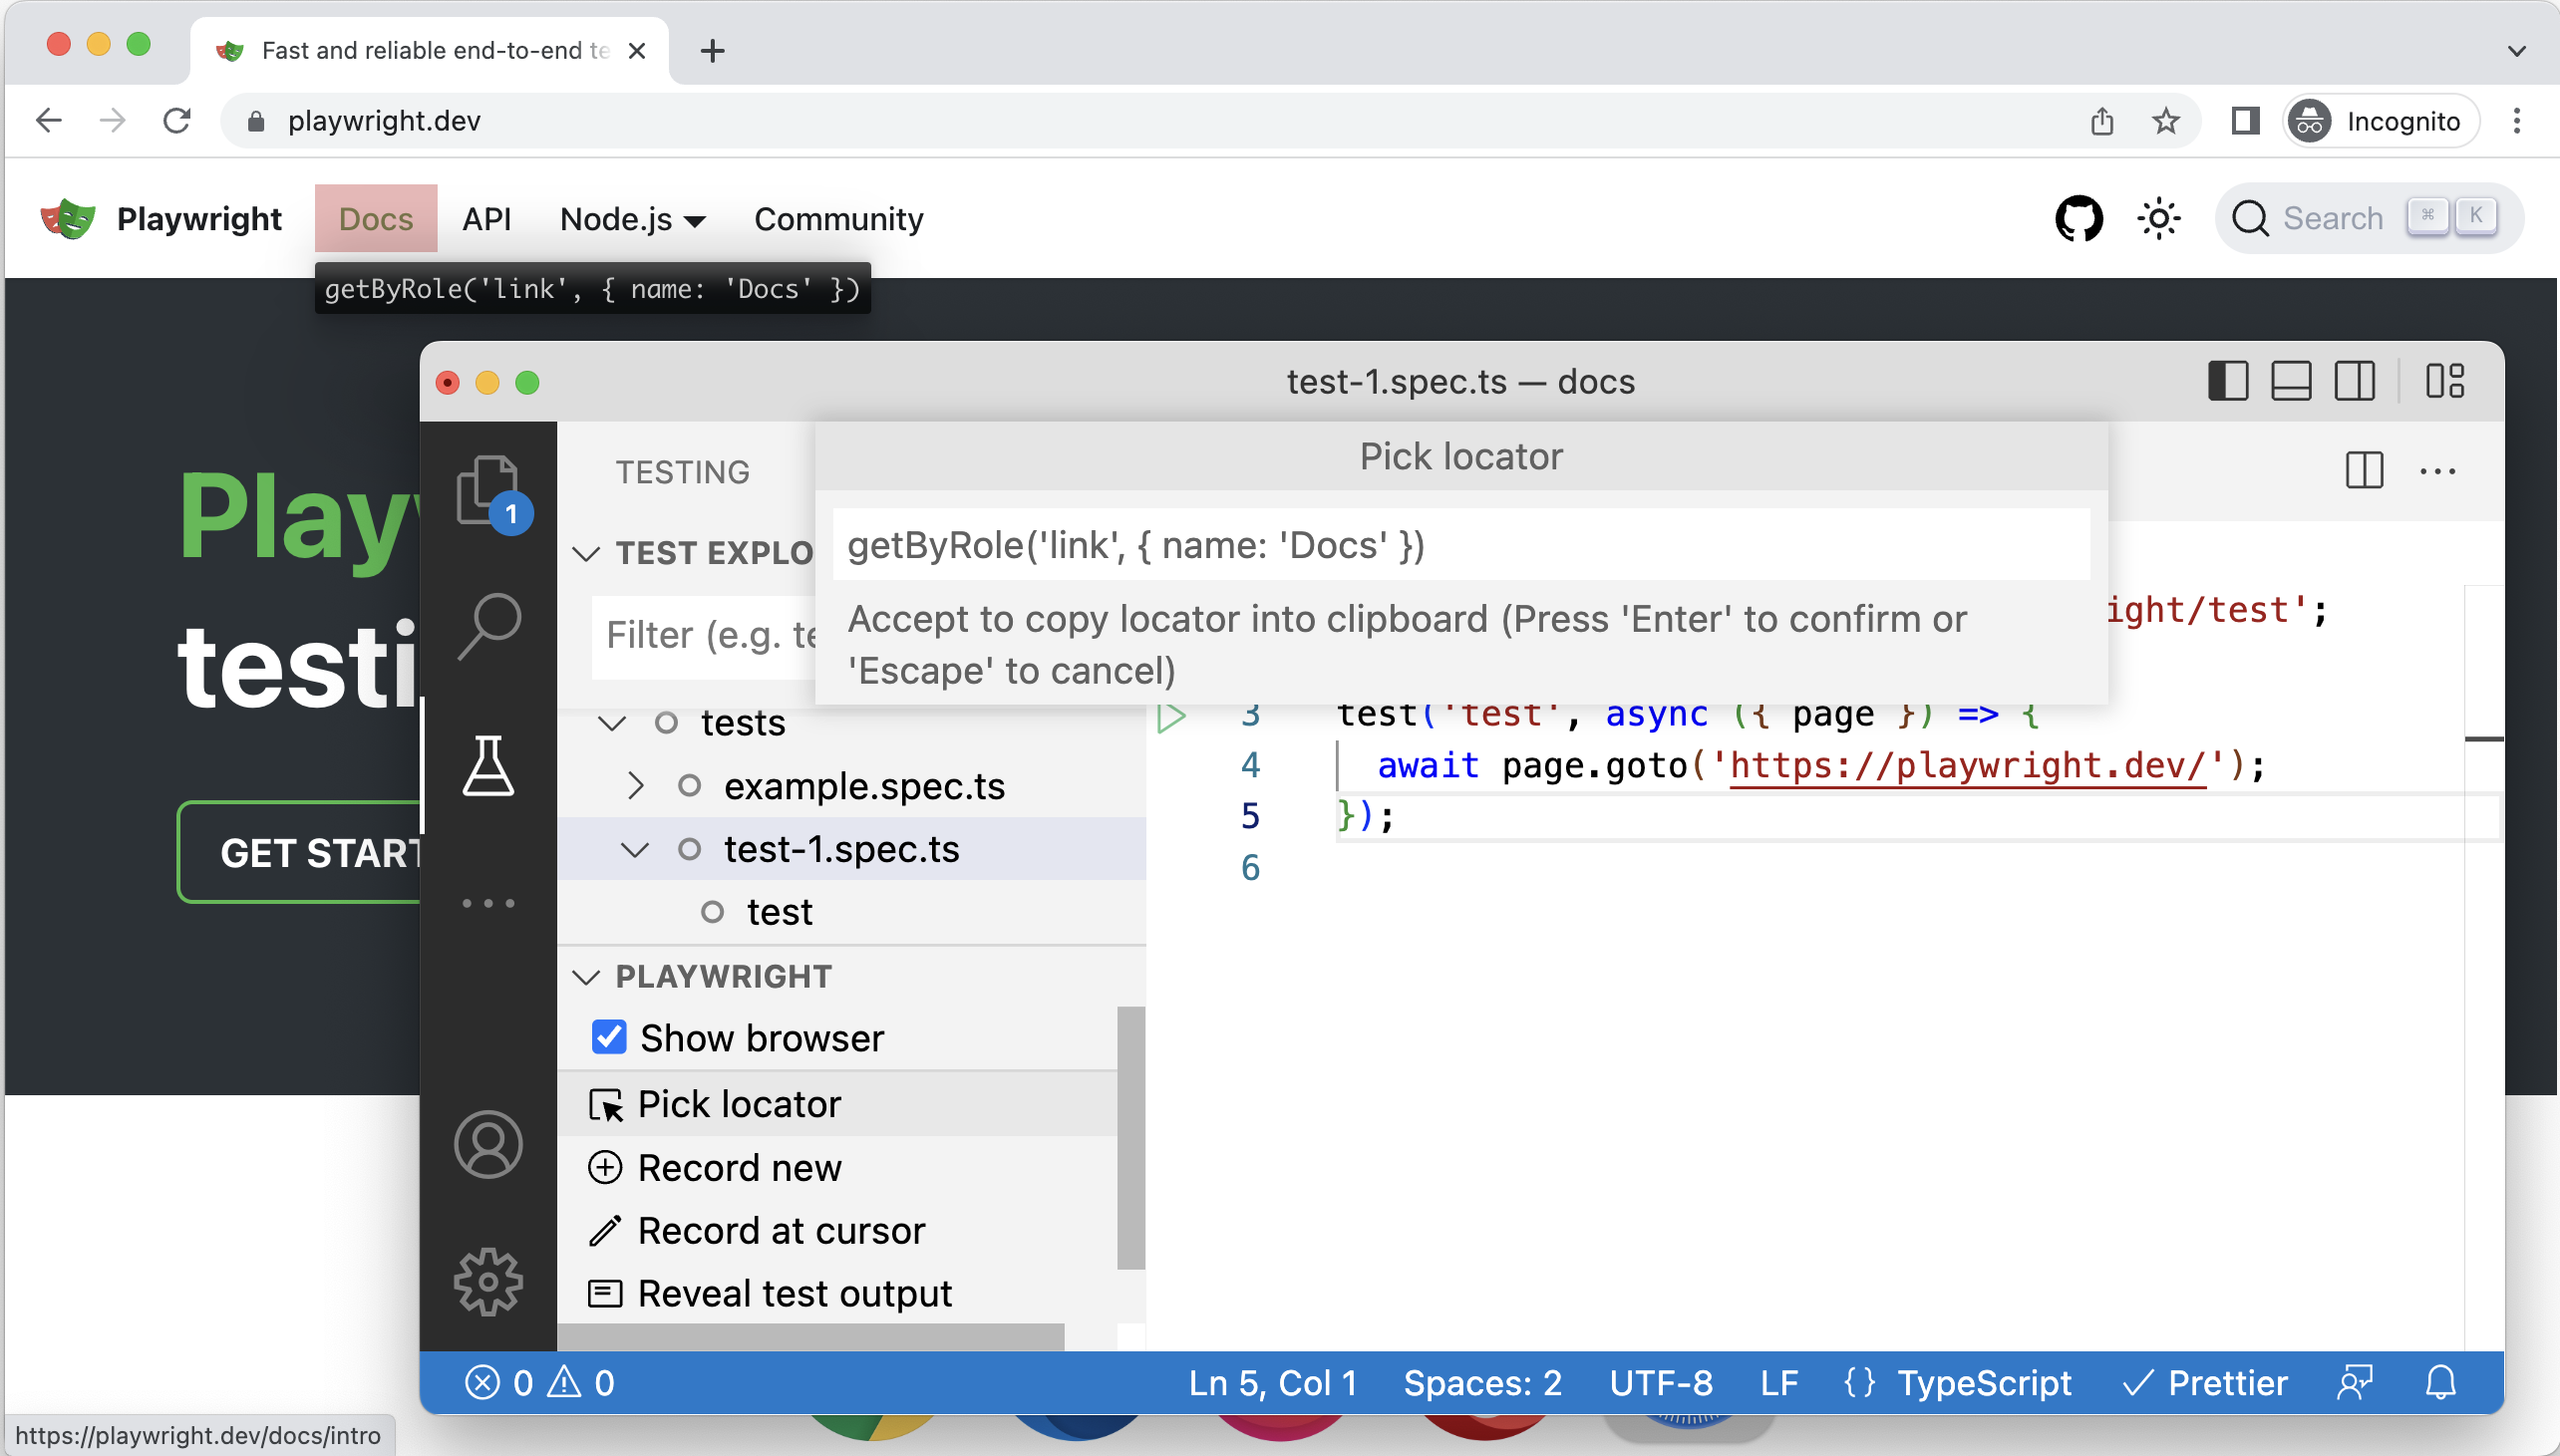
In the Playwright Inspector screen, if you click Pick locator and then select an element on the screen, it automatically generates the test code.
If you can reference this feature when generating code, you can boost development productivity.
Negating Matchers
Generally, you just add .not in front of the matcher.
By default, when an assertion errors out the test terminates, but when Soft Assertions are applied, the test does not terminate and only marks the failure.
// Make a few checks that will not stop the test when failed...await expect.soft(page.getByTestId('status')).toHaveText('Success');await expect.soft(page.getByTestId('eta')).toHaveText('1 day');// ... and continue the test to check more things.await page.getByRole('link', { name: 'next page' }).click();await expect .soft(page.getByRole('heading', { name: 'Make another order' })) .toBeVisible();
Polling
Use expect.poll when waiting asynchronously. (Mostly used when awaiting an API response)
Because creating a browser instance is expensive, Playwright is designed to maximize what a single instance can do through multiple browser contexts.
A browser context is an isolated, session-like environment within a browser instance. It is fast and inexpensive to create. It's recommended to run each test in a new browser context to isolate browser state between tests.
A context can have pages, which represent a single tab or popup window within the context. Use it when navigating to a URL and interacting with the page's content.
Using pages, you can work as if in different tabs. In the example, we navigate to different pages.
A page can in turn have one or more frame objects. Each page has a main frame, and page-level interactions (such as clicks) are assumed to operate on the main frame. Additional frames can exist along with iframe tags.
Using frames, you can retrieve or manipulate elements inside the frame. The example shows ways to obtain frames and how to interact with elements inside a frame.
Called when focusing an input, textarea, or [contenteditable] element and entering text directly
Can be used as a replacement for locator.fill()
// Text inputawait page.getByRole('textbox').fill('Peter');// Date inputawait page.getByLabel('Birth date').fill('2020-02-02');// Time inputawait page.getByLabel('Appointment time').fill('13:15');// Local datetime inputawait page.getByLabel('Local time').fill('2020-03-02T05:15');
Type characters → real keyboard type
Behaves as if real keyboard input is being made to the input element
Can be used as a replacement for locator.type()
// Type character by characterawait page.locator('#area').type('Hello World!');
An action to select an element or create a shortcut
Can use the keyboardEvent.key event
Can replace locator.press()
// Hit Enterawait page.getByText('Submit').press('Enter');// Dispatch Control+Rightawait page.getByRole('textbox').press('Control+ArrowRight');// Press $ sign on keyboardawait page.getByRole('textbox').press('$');// <input id=name>await page.locator('#name').press('Shift+A');// <input id=name>await page.locator('#name').press('Shift+ArrowLeft');
Called when setting or getting the checked/unchecked state for input[type=checkbox], input[type=radio], and [role=checkbox] elements
Can be used as a replacement for locator.setChecked()
// Check the checkboxawait page.getByLabel('I agree to the terms above').check();// Assert the checked stateexpect( await page.getByLabel('Subscribe to newsletter').isChecked(),).toBeTruthy();// Select the radio buttonawait page.getByLabel('XL').check();
Used for single/multiple selection of a select element
Can select a specific option by value or label
Can be used as a replacement for locator.selectOption()
// Single selection matching the valueawait page.getByLabel('Choose a color').selectOption('blue');// Single selection matching the labelawait page.getByLabel('Choose a color').selectOption({ label: 'Blue' });// Multiple selected itemsawait page .getByLabel('Choose multiple colors') .selectOption(['red', 'green', 'blue']);
Waits until the DOM is accessible
Waits until the DOM is visible (no empty, no display:none, no visibility:hidden)
Waits until motion stops (e.g. transition finishes)
When the element is visible within the viewport (scroll)
Waits until the element is not obscured by other elements
If the element is detached, waits until it is attached again
Force click: Can force a click even when obscured by another element
dispatchEvent: When you want to dispatch only the click event regardless of user input
// Generic clickawait page.getByRole('button').click();// Double clickawait page.getByText('Item').dblclick();// Right clickawait page.getByText('Item').click({ button: 'right' });// Shift + clickawait page.getByText('Item').click({ modifiers: ['Shift'] });// Hover over elementawait page.getByText('Item').hover();// Click the top left cornerawait page.getByText('Item').click({ position: { x: 0, y: 0 } });// Force Clickawait page.getByRole('button').click({ force: true });// Dispatch Clickawait page.getByRole('button').dispatchEvent('click');
Can be used when an input element has type="file"
Can be used as a replacement for locator.setInputFiles()
If the element is dynamically created, you can wait with waitForEvent (can be used as a replacement for page.on('filechooser'))
// Select one fileawait page.getByLabel('Upload file').setInputFiles('myfile.pdf');// Select multiple filesawait page .getByLabel('Upload files') .setInputFiles(['file1.txt', 'file2.txt']);// Remove all the selected filesawait page.getByLabel('Upload file').setInputFiles([]);// Upload buffer from memoryawait page.getByLabel('Upload file').setInputFiles({ name: 'file.txt', mimeType: 'text/plain', buffer: Buffer.from('this is test'),});// Start waiting for file chooser before clicking. Note no await.const fileChooserPromise = page.waitForEvent('filechooser');await page.getByLabel('Upload file').click();const fileChooser = await fileChooserPromise;await fileChooser.setFiles('myfile.pdf');
Can be replaced with the locator.focus() function
await page.getByLabel('Password').focus();
Can replace locator.dragTo()
When replacing with lower-level functions (you can use locator.hover, mouse.down, mouse.move, mouse.up)
https://playwright.dev/docs/test-assertions
Assertions are used to check expected values against result values.
When performing Playwright test assertions, you can use the expect function, which provides a variety of assertion functions.
By default, execution terminates when a test fails, but in the case of a soft assertion it does not terminate.
To check whether a failure occurred, you can use test.info
// Make a few checks that will not stop the test when failed...await expect.soft(page.getByTestId('status')).toHaveText('Success');await expect.soft(page.getByTestId('eta')).toHaveText('1 day');// ... and continue the test to check more things.await page.getByRole('link', { name: 'next page' }).click();await expect .soft(page.getByRole('heading', { name: 'Make another order' })) .toBeVisible();// test.info//// Make a few checks that will not stop the test when failed...await expect.soft(page.getByTestId('status')).toHaveText('Success');await expect.soft(page.getByTestId('eta')).toHaveText('1 day');//// Avoid running further if there were soft assertion failures.expect(test.info().errors).toHaveLength(0);
Express a specific error message
Can be used as a replacement for expect.soft
await expect(page.getByText('Name'), 'should be logged in').toBeVisible();Error: should be logged in// Call log:// - expect.toBeVisible with timeout 5000ms// - waiting for "getByText('Name')"// 2 |// 3 | test('example test', async({ page }) => {// > 4 | await expect(page.getByText('Name'), 'should be logged in').toBeVisible();// | ^// 5 | });// 6 |// 동일한 코드expect.soft(value, 'my soft assertion').toBe(56);
Use expect.poll when waiting asynchronously. (Mostly used when awaiting an API response)
// Iterate elementsfor (const row of await page.getByRole('listitem').all()) console.log(await row.textContent());// Iterate using regular for loopconst rows = page.getByRole('listitem');const count = await rows.count();for (let i = 0; i < count; ++i) console.log(await rows.nth(i).textContent());// Evaluate in the pageconst rows = page.getByRole('listitem');const texts = await rows.evaluateAll(list => list.map(element => element.textContent),);
Auto-waiting
It automatically waits until all relevant checks pass, and then performs the next requested action.
For example, in the case of page.click(), Playwright checks the following:
Test pages where the end user can view the page or interact with it.
Isolate tests as much as possible when writing them
Isolate the work for each test individually (local/session storage, data, cookies, etc.)
When you need to avoid repeating something specific in tests, use before and after hooks
When navigating to a specific URL within a test file or logging into part of the app, use before hooks
import { test } from '@playwright/test';test.beforeEach(async ({ page }) => { // Runs before each test and signs in each page. await page.goto('https://github.com/login'); await page.getByLabel('Username or email address').fill('username'); await page.getByLabel('Password').fill('password'); await page.getByRole('button', { name: 'Sign in' }).click();});test('first', async ({ page }) => { // page is signed in.});test('second', async ({ page }) => { // page is signed in.});
Write test code that follows the overall flow (long tests are fine.)
When testing the entire app flow, handling assertions for multiple actions is fine.
Splitting a long test into individual tests unnecessarily should be avoided, because it slows down test execution.
When you want to display errors without terminating on a long test error, you can use soft assertions.
// Make a few checks that will not stop the test when failed...await expect.soft(page.getByTestId('status')).toHaveText('Success');// ... and continue the test to check more things.await page.getByRole('link', { name: 'next page' }).click();
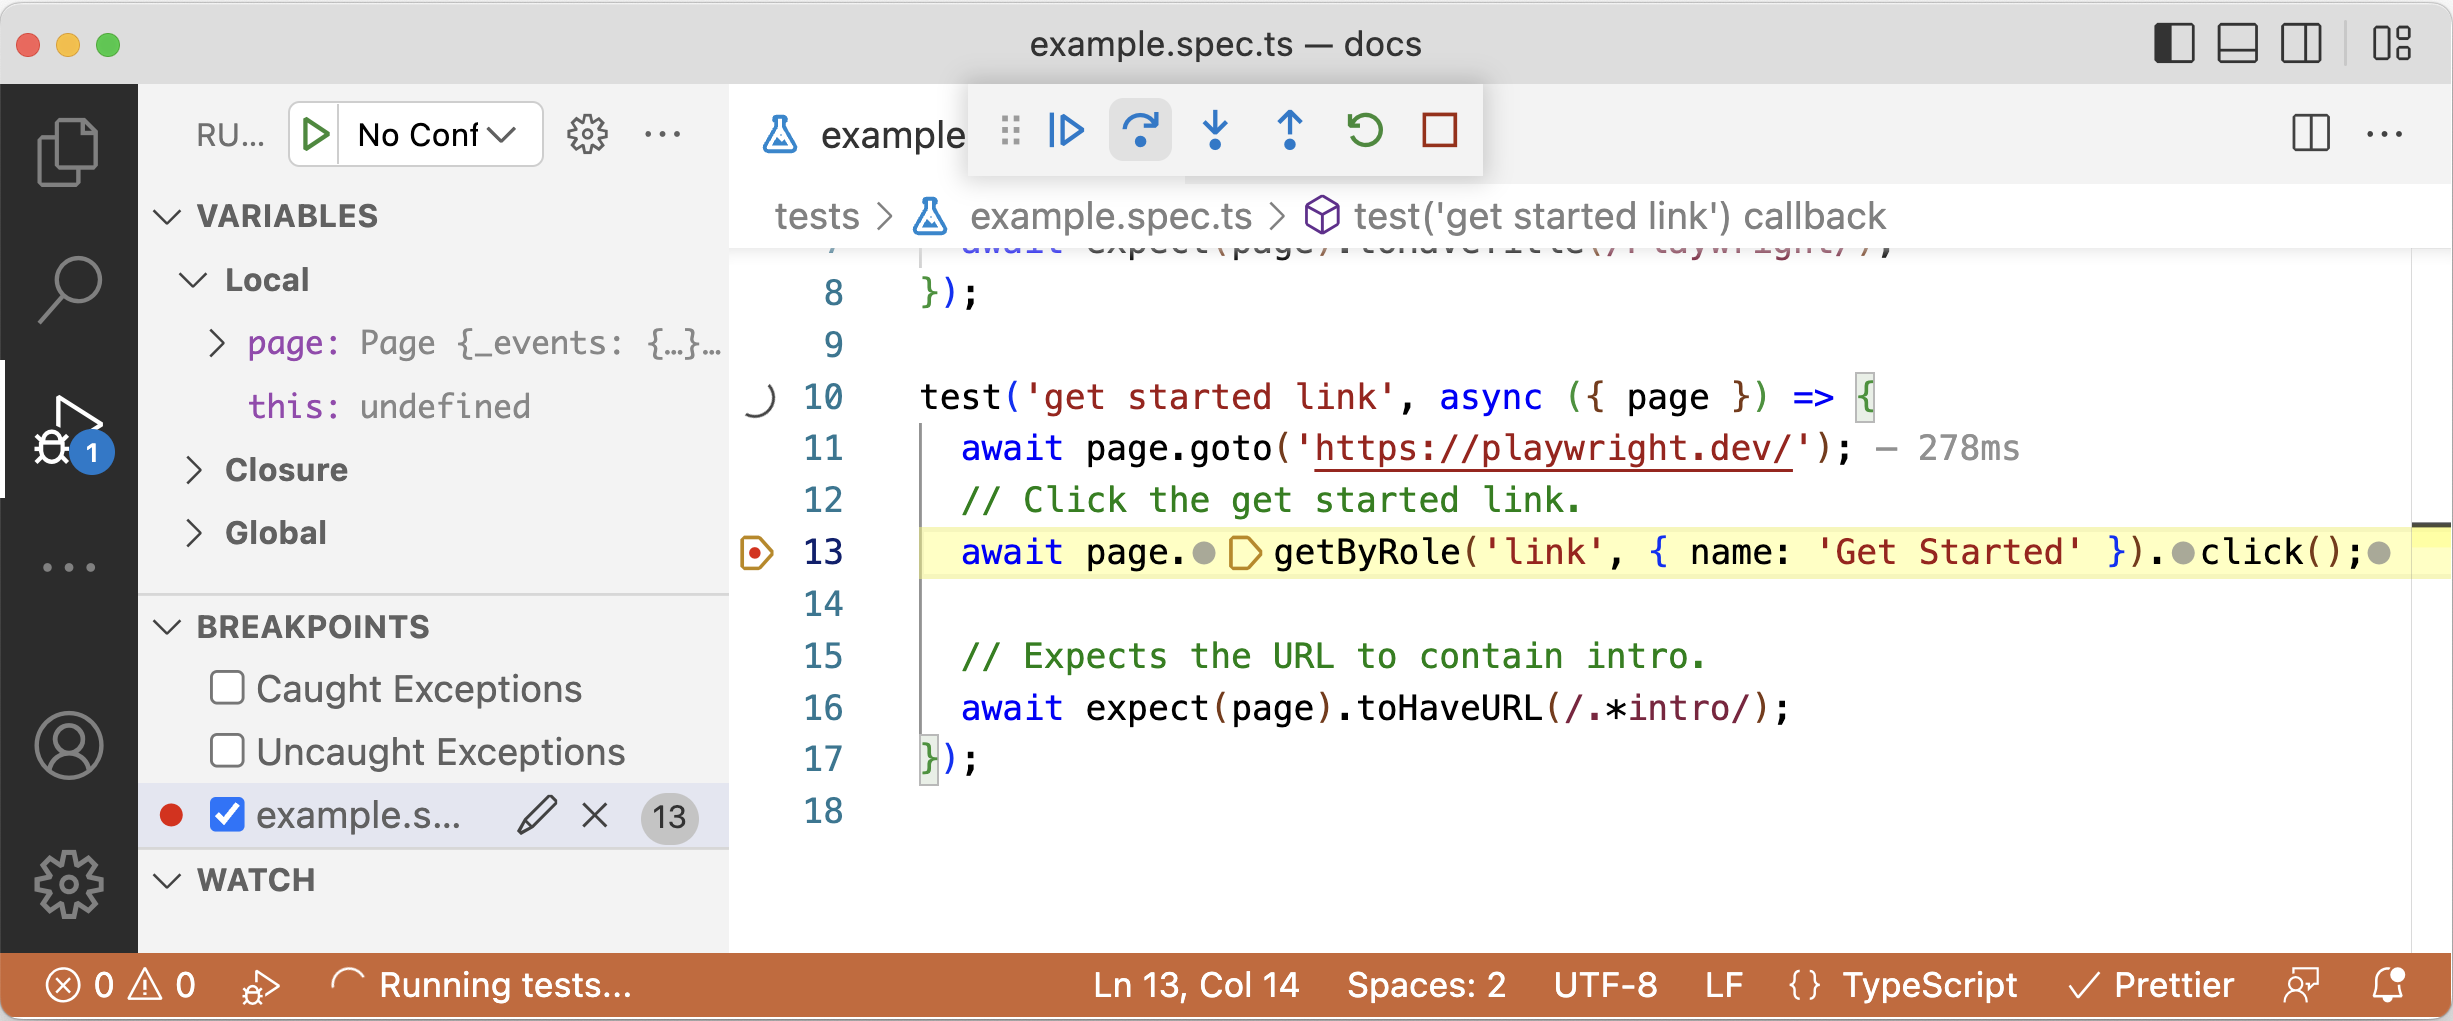
Can debug by adding a specific test file and test line number
npx playwright test --debugnpx playwright test example.spec.ts:9 --debug
Realistic Ways to Apply Playwright
Exception handling for marketing tools: In progress
Modify things so that marketing tools like GA and Braze don't run in environments launched by the test automation tool (branching using navigator.webdriver)