figma mcp link
SeungAh Hong
Development Environment
- VSCode version: 1.99 or higher
- Copilot account required
How to Integrate with Copilot
Issuing a Figma API access token
Step 1: Prerequisites
- Node.js (v16.0 or higher)
- npm (v7.0 or higher) or pnpm (v8.0 or higher)
- Figma account: A Professional or Enterprise plan is recommended.
- Figma API access token: You need a Figma API access token with read permissions.
Step 2: How to get a Figma API access token
To integrate MCP with Figma, you need an API access token. This token acts as a security key that allows MCP to interact with your Figma account. Here is a step-by-step guide to creating and storing a Figma API access token:
Register a Figma account:
- Visit the official Figma website: Go to the Figma website.
- Sign up: If you do not have an account, create a new one.
Step 2: Download the Figma app:
- Choose your operating system: Download the Figma desktop app compatible with your operating system (Windows, macOS, or Linux).
- Install the app: Follow the simple installation instructions to set up Figma on your device.
Log in to Figma:
- Open the app: Launch the Figma desktop app.
- Log in: Log in using your Figma credentials.
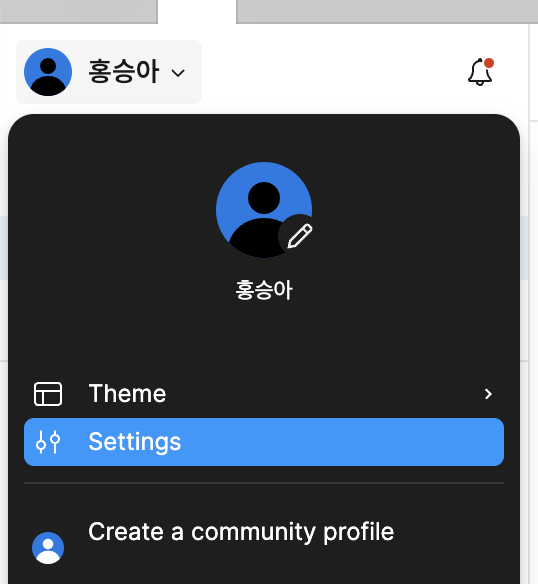
Access your profile settings:
- Click the profile icon: In the sidebar, click the profile icon (usually your name or avatar).
- Open the dropdown menu: When the menu appears, click Settings.
Go to security settings:
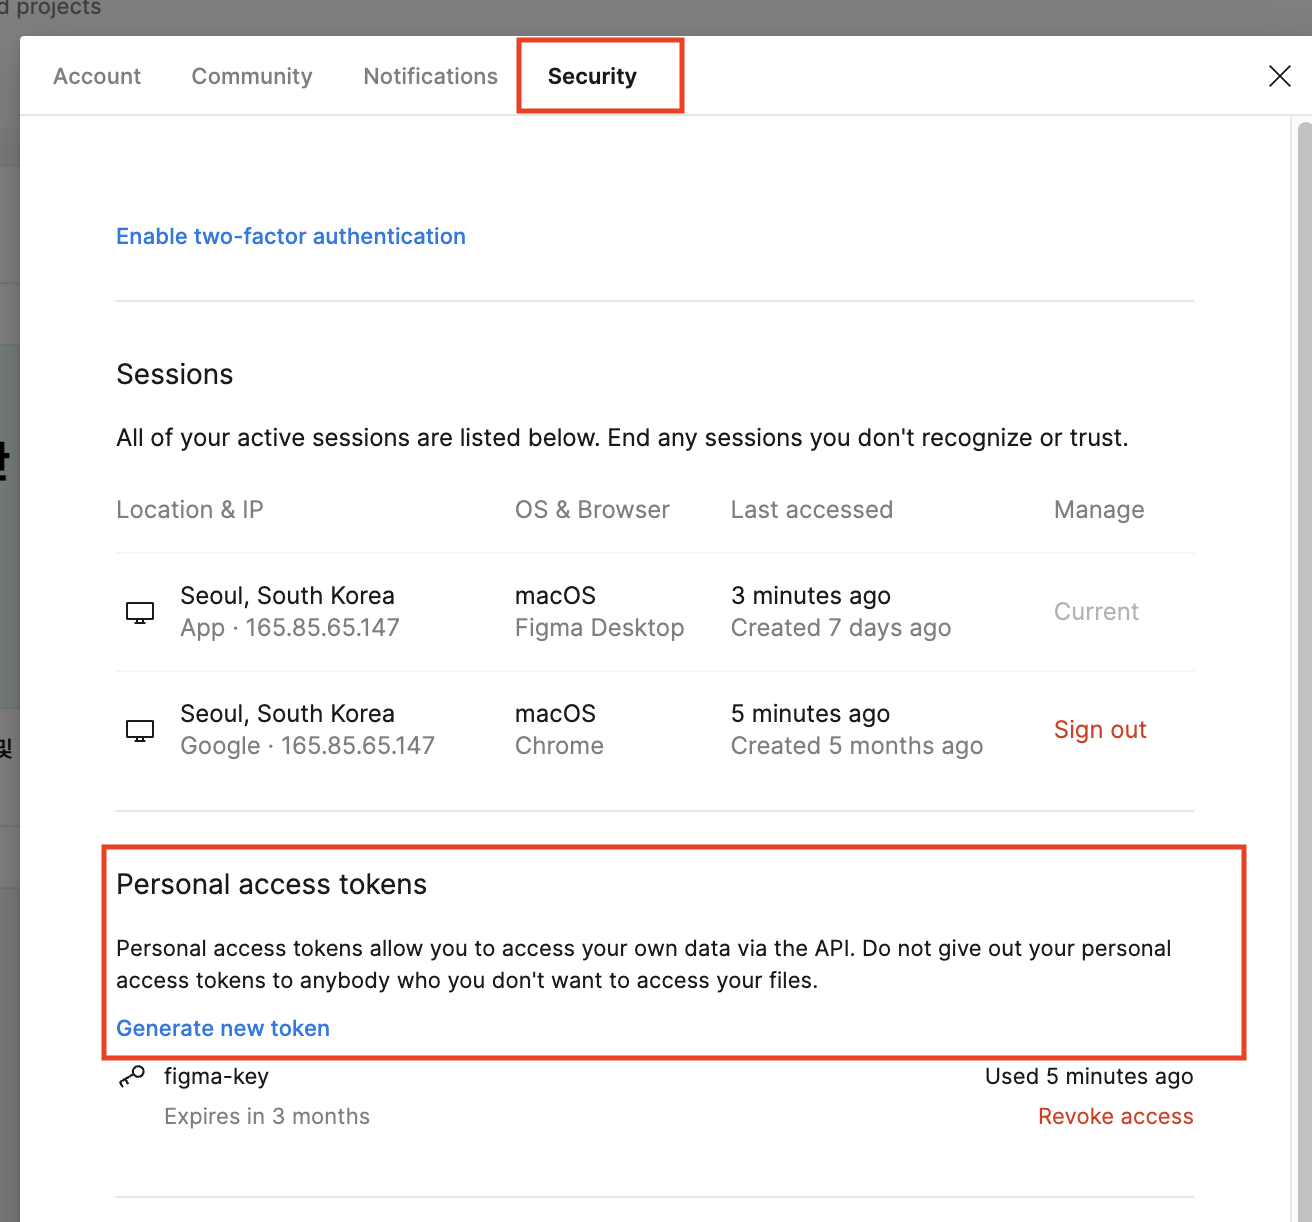
- Go to Security: In the settings menu, find and click the Security tab.
- Find personal access tokens: Scroll down to the Personal access tokens section.
- Generate a new token:
- Click "Generate new token": A prompt to create a new token opens.
- Name the token: Give it a descriptive name that makes its purpose easy to identify, such as
Figma_MCP. - Create the token: Click the Generate button to create the API access token.
How to configure the .vscode > mcp.json file
- Only create this file if an mcp.json file does not already exist.
- Only for Copilot, you must put it under the
serversobject property.
{
  "servers": {
    "Figma MCP": {
      "command": "npx",
      "args": [
        "-y",
        "figma-developer-mcp",
        "--figma-api-key=figd_xxxxxxxxxxxxxxxxxxxxxxxxxxxxxxxxxxxxxxx", -> add the Figma-issued key
        "--stdio"
      ],
      "env": {
        "NODE_TLS_REJECT_UNAUTHORIZED": "0" -> whether to verify authentication on API calls (it is on by default, so turn it off. Otherwise an authentication error occurs when calling the API)
      }
    },
  }
Starting the MCP Server
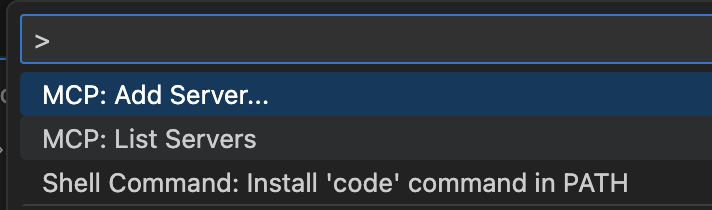
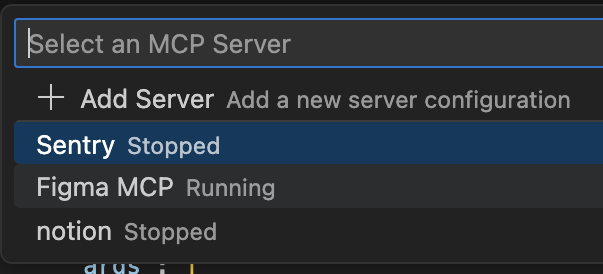
- CMD+Shift+P → MCP: List Servers
- Select Figma MCP
- Start the server
- Check the output
- Note: when running alongside the Claude MCP integration, an error occurs during API calls, so be sure to leave the claude_desktop_config.json file as an empty object.

Copilot → Figma Mcp Server
-
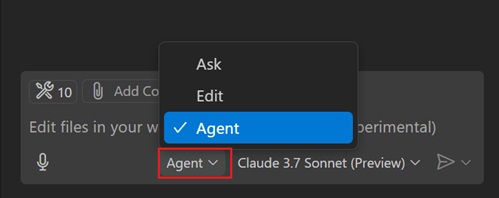
In the chat screen, switch to Agent mode.
- If you are running multiple MCP servers, start the MCP you want to use.
- How to check: CMD+Shift+P > MCPL List Servers > run Figma MCP
-
Write a chat prompt (make sure to share the link, not dev mode).
https://www.figma.com/design/~~

Based on the Figma link, write it in React, TypeScript, and module.scss
Claude Desktop Integration
Installation
- Install Claude Desktop from the https://claude.ai/download link
- Reference: https://docs.anthropic.com/en/docs/claude-code/tutorials#import-mcp-servers-from-claude-desktop
Configuration File
- Menu > Settings > Developer > Edit Config
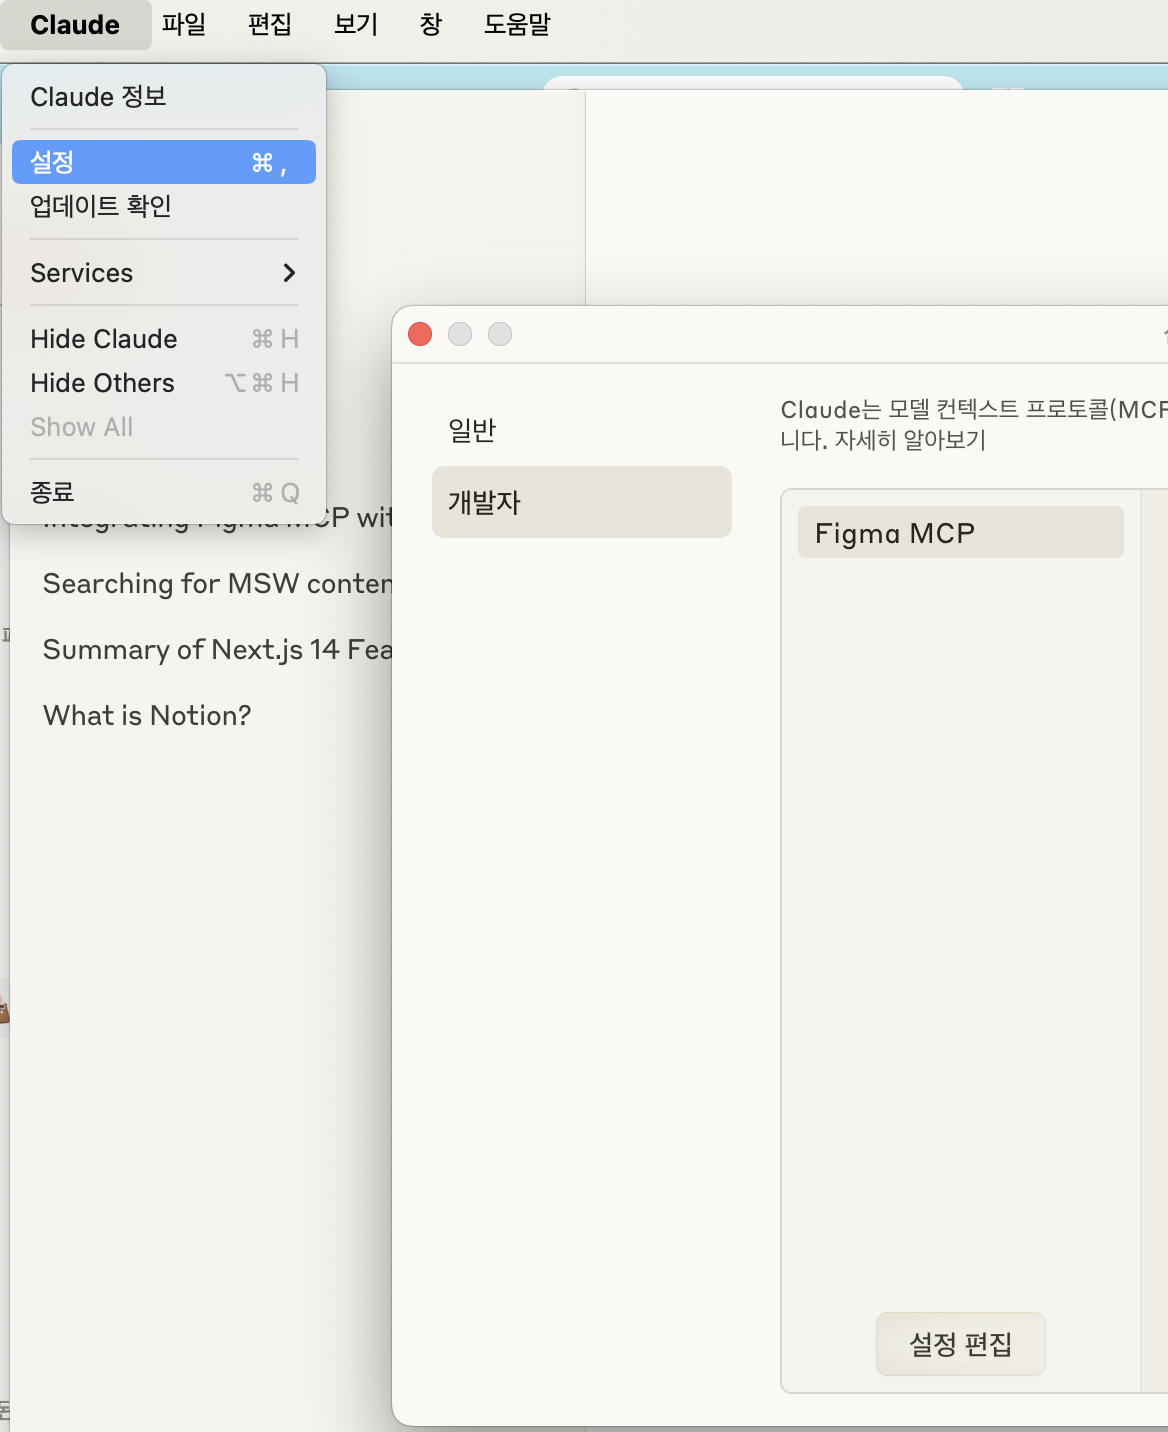
- Add the Figma MCP integration settings property to claude_desktop_config.json
{
  "mcpServers": {
    "Figma MCP": {
      "command": "npx",
      "args": [
        "-y",
        "figma-developer-mcp",
        "--figma-api-key=figd_xxxxxxxxxxxxxxxxxxxxxxxxxxxxxxxxxxxxxxx", -> add the Figma-issued key
        "--stdio"
      ],
      "env": {
        "NODE_TLS_REJECT_UNAUTHORIZED": "0" -> whether to verify authentication on API calls (it is on by default, so turn it off. Otherwise an authentication error occurs when calling the API)
      }
    }
  }
}
Running
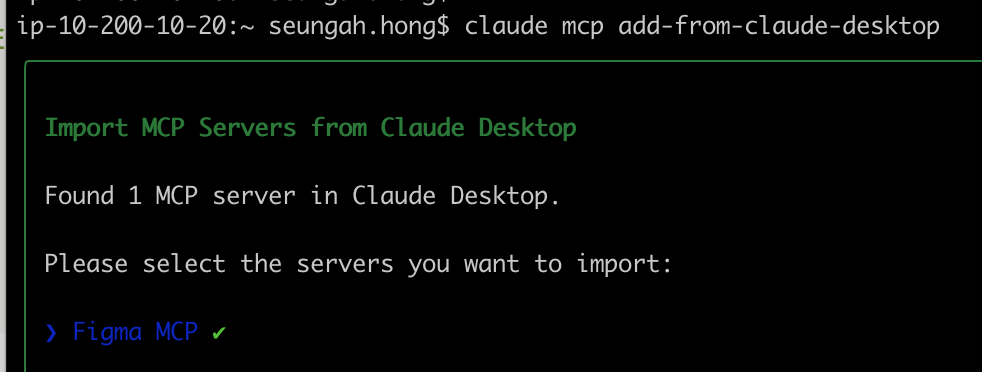
Import servers from Claude Desktop
claude mcp add-from-claude-desktopSelect which servers to import
- Select the MCP servers you want to import.
Write a chat prompt (make sure to share the link, not dev mode).
https://www.figma.com/design/~~

Based on the Figma link, write it in React, TypeScript, and module.scss